ILLUSTRATION with TEXT & IMAGE TRACE Checklist
Remember
the goal of this project is to use the tools and skills that you have learned
so far with the Illustrator Program as well as Graphic Design and apply them to
your work. This Illustration Project is worth 60 points. Please be aware that
just because you used the tool or applied the skill does not automatically give
you all of the paints. This is an art class so you must be creative in your
work.

Part 1:
Look
at the 2 Illustration with Text Journal entries you completed in Journal #4. Of
the 2 select one and trace just the shapes that make your image. Think of it as
a coloring book template. You may add stripes or other textures like zigzags to
your images.
In
order to trace the image you will need to get your Journal and lay the page you
are tracing on one of the light boxes near the screen. You will use a white piece of
paper and a sharpie to trace the image in your Journal. Only your IMAGE NO
TEXT.


Once
you are done tracing your image and have made sure that all the lines are
closed you will need to take a picture of the sketch. ONLY INCLUDE THE PAPER
not anything else like table or desk. Next email the image to yourself.
Part 2:
Make
sure you follow these instructions in order. Do not omit anything.
Now
that you have emailed your image to yourself you need to download it. It might
be to big so open it. It should open in Preview. Go to tools and adjust size
and adjust to about 8 by 10 inches if a portrait type of image or 10 by 8
inches if landscape.
Next
open a new Illustrator file and make it what ever dimension your image is. 8 x
10 inches or 10 x 8 inches. Than go to EDIT and PLACE. Select your image. Move
the image onto your artboard and adjust with the selection tool.


Next go to the
CARROT or white triangle next to the IMAGE TRACE button above the artboard and
scroll to Black and White Logo. After that go back and click EXPAND. Than
select all and go to OBJECT- LIVE PAINT and MAKE.


You
can now paint your segments. Make sure to use gradients in your work.


Part 3
Add
a pattern or texture to your background by making sure you paint the space
around your illustration clear or transparent and lock it. Next add a new layer
and apply the pattern to your artboard.

And lastly add your text. Make sure to download and use a font that enhances your work.


And lastly add your text. Make sure to download and use a font that enhances your work.
Consider making making your text an outline as well.

Please
remember to keep your client in mind while you design this image.
Each
of the following check points are worth 10 points. The project is worth 60
points.
___
Illustration uses the image trace,
live paint, gradients and patterns.
___
Background either uses texture or a
pattern.
___
The placement of the image(s) creates
balance: symmetrical or asymmetrical.
___
Your text enhances the illustration.
A font was found and uploaded.
___ Image was approved and posted/ published
on your weebly.
___
Describe your client using 3
demographics
1.________________________________________________________________
2. ________________________________________________________________
3. ________________________________________________________________
To download the checklist click HERE.
Please view Drawing in Illustrator at http://www.lynda.com/Illustrator-tutorials/Drawing-Illustrator/761/47609-4.html
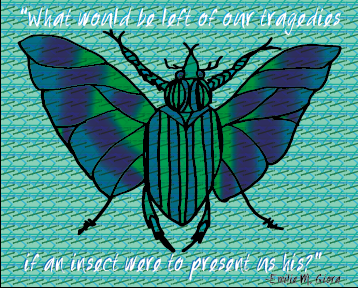
Below are some samples.

This one is missing text and a pattern.

This one should have a pattern added.
Illustration with Text Checklist by Meredith Giltner on Scribd